Overlays
Overlays offer a visual representation of the land your people settled upon. With overlays, you can quickly scan an area to determine the best locations for plant crops, build homes, mine resources, and more.
Desirability

The Desirability overlay (default hotkey: G) shows the most desirable areas in town for shelter construction. Shelters in desirable areas can upgrade to higher tiers, which generate additional tax revenue and house more people.
Upgraded homes are also a prerequisite to upgrade the Town Center, which in turn unlocks new structures.
To learn more about desirability, stop by the Desirability page.
Fertility
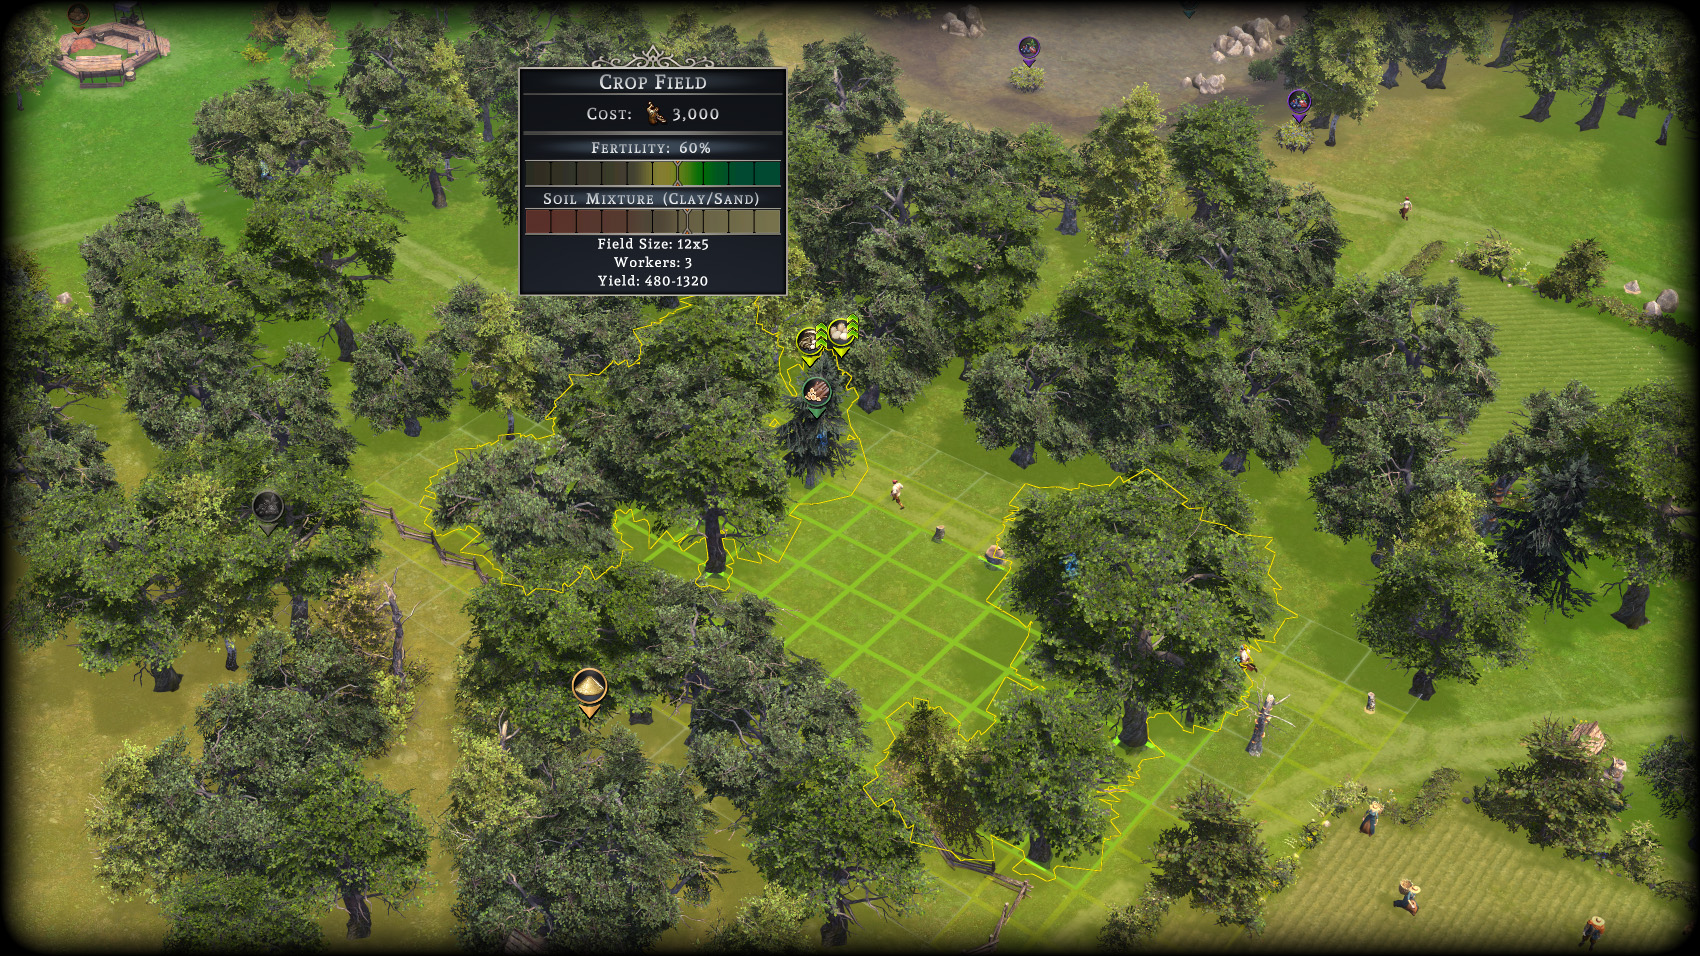
The Fertility overlay comes in three types: crops, fruit trees, and grazing. When activating the overlay (default hotkey: F), the information for crop fertility is shown.
While Crop Fields can be placed almost anywhere, fertile ground is an ideal starting point as initial yields will be higher and less work will be required to raise the fertility further.
Trees grown at an Arborist have different requirements from crops and as such have their own fertility overlay that is shown when placing the Arborist building or when planting fruit trees around it.
Likewise, Barn placement displays ideal grazing grounds for livestock.
Irrigation
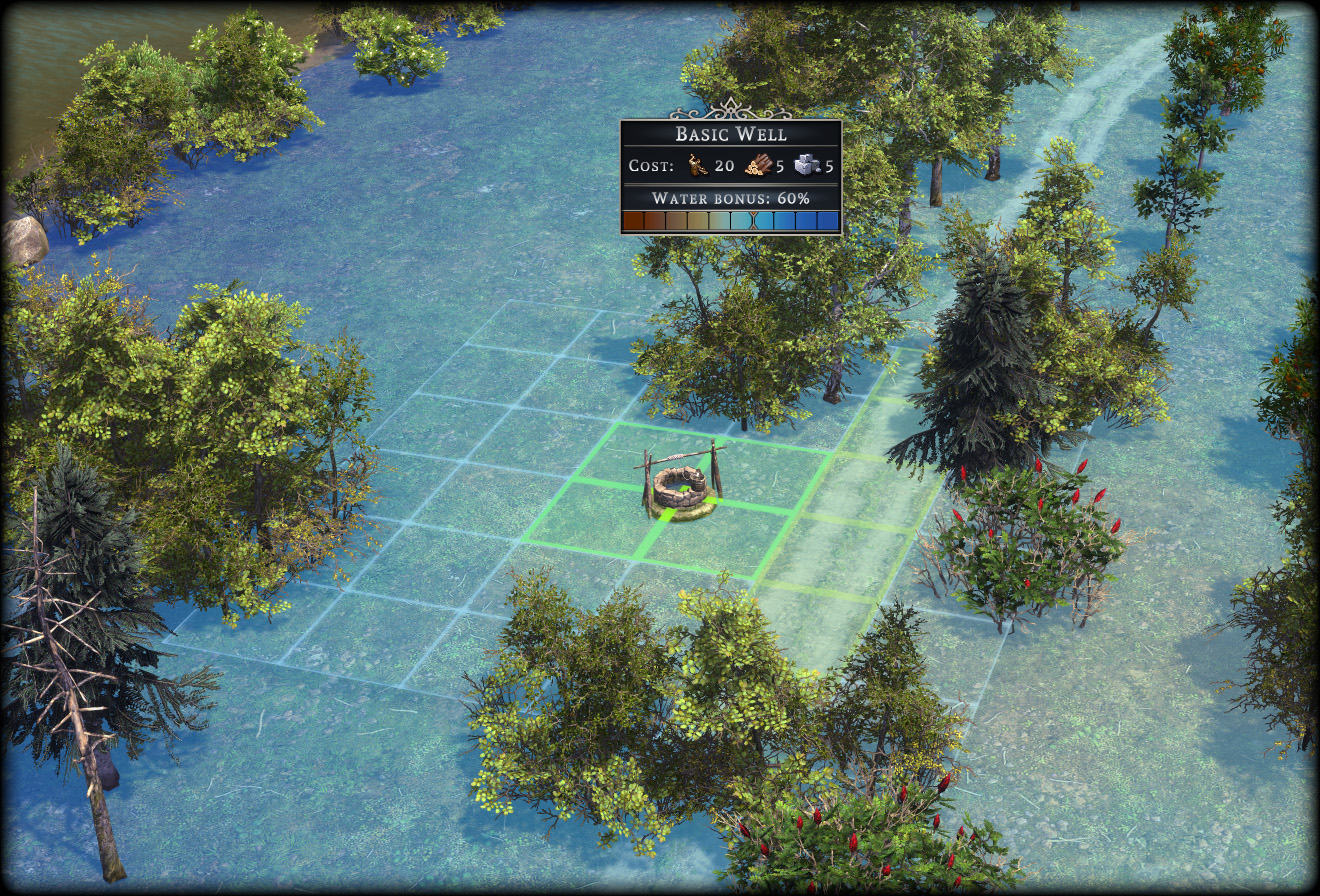
The Irrigation overlay (default hotkey: I) displays the water table in the area. Areas with a high water bonus are ideal for Well placement as the supply will replenish more readily even outside of rainy weather.
The water table can become diminished through construction and clearing trees. Because of this, densely constructed areas have much lower water tables. This can be remedied a bit by planting trees near wells.
Fresh clean drinking water is critical to the survival of the settlement.
Ore
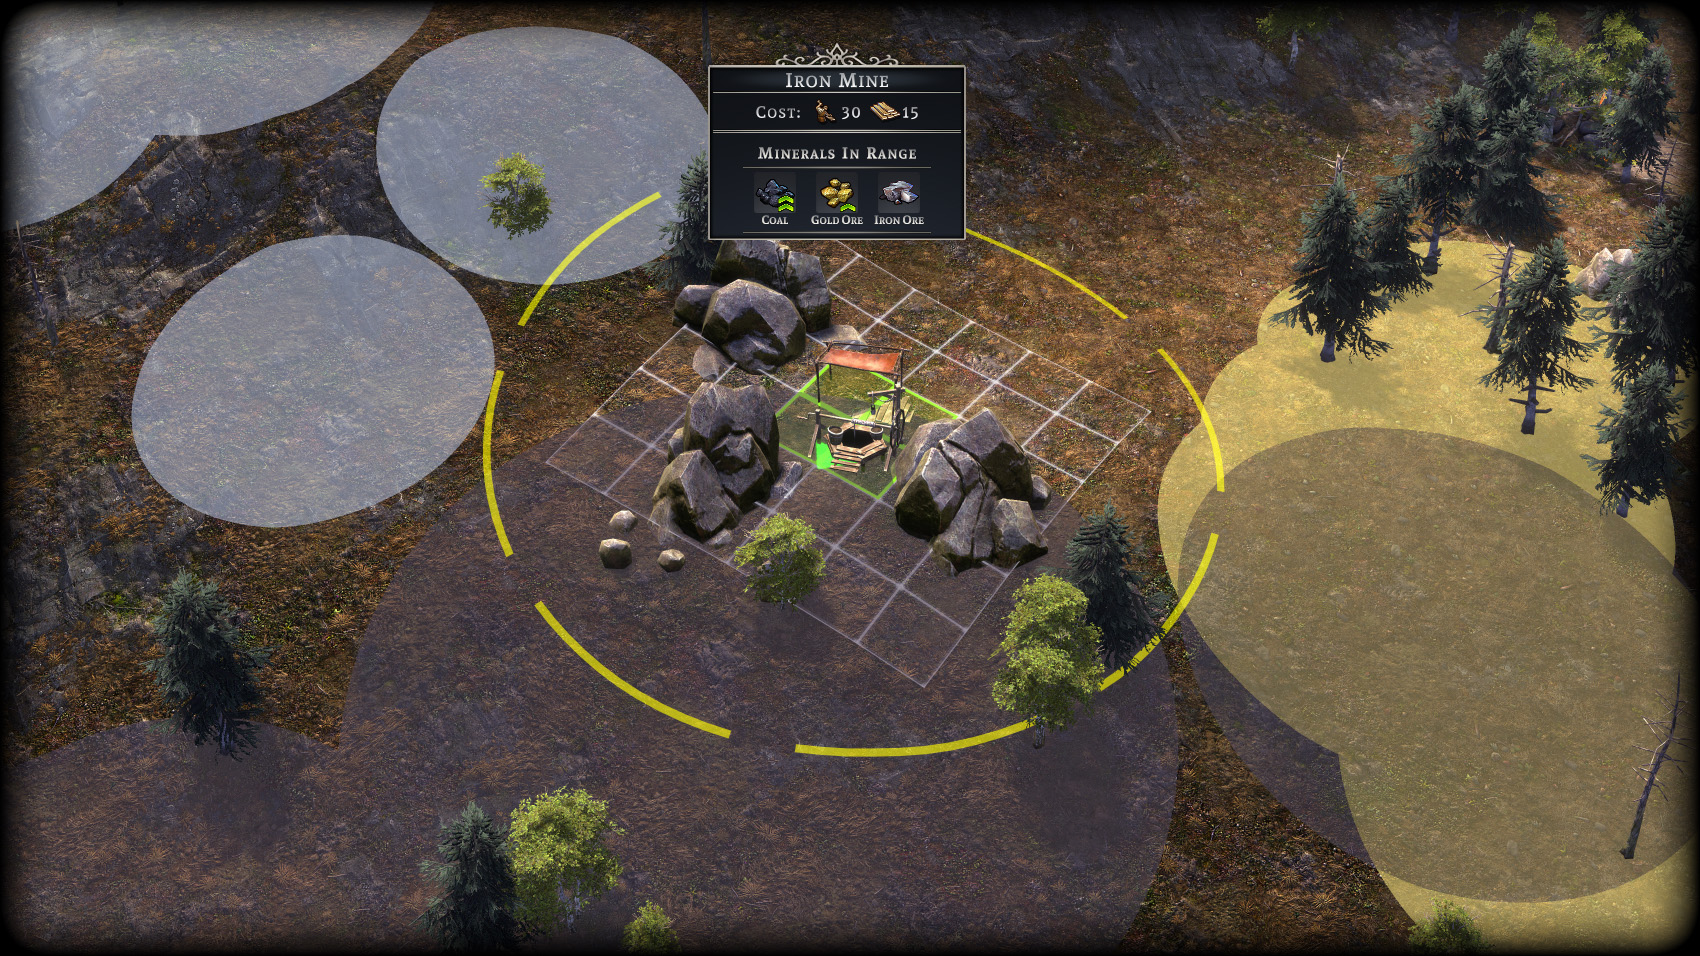
When placing mines and pits, additional overlays are displayed showing resource deposits. Iron appears in light grey, Coal in dark grey, and gold in bright yellow.
In order to harvest these resources, the correct mine must be placed within a deposit. Every deposit has a finite amount of ore and will eventually be depleted and the mine shut down.
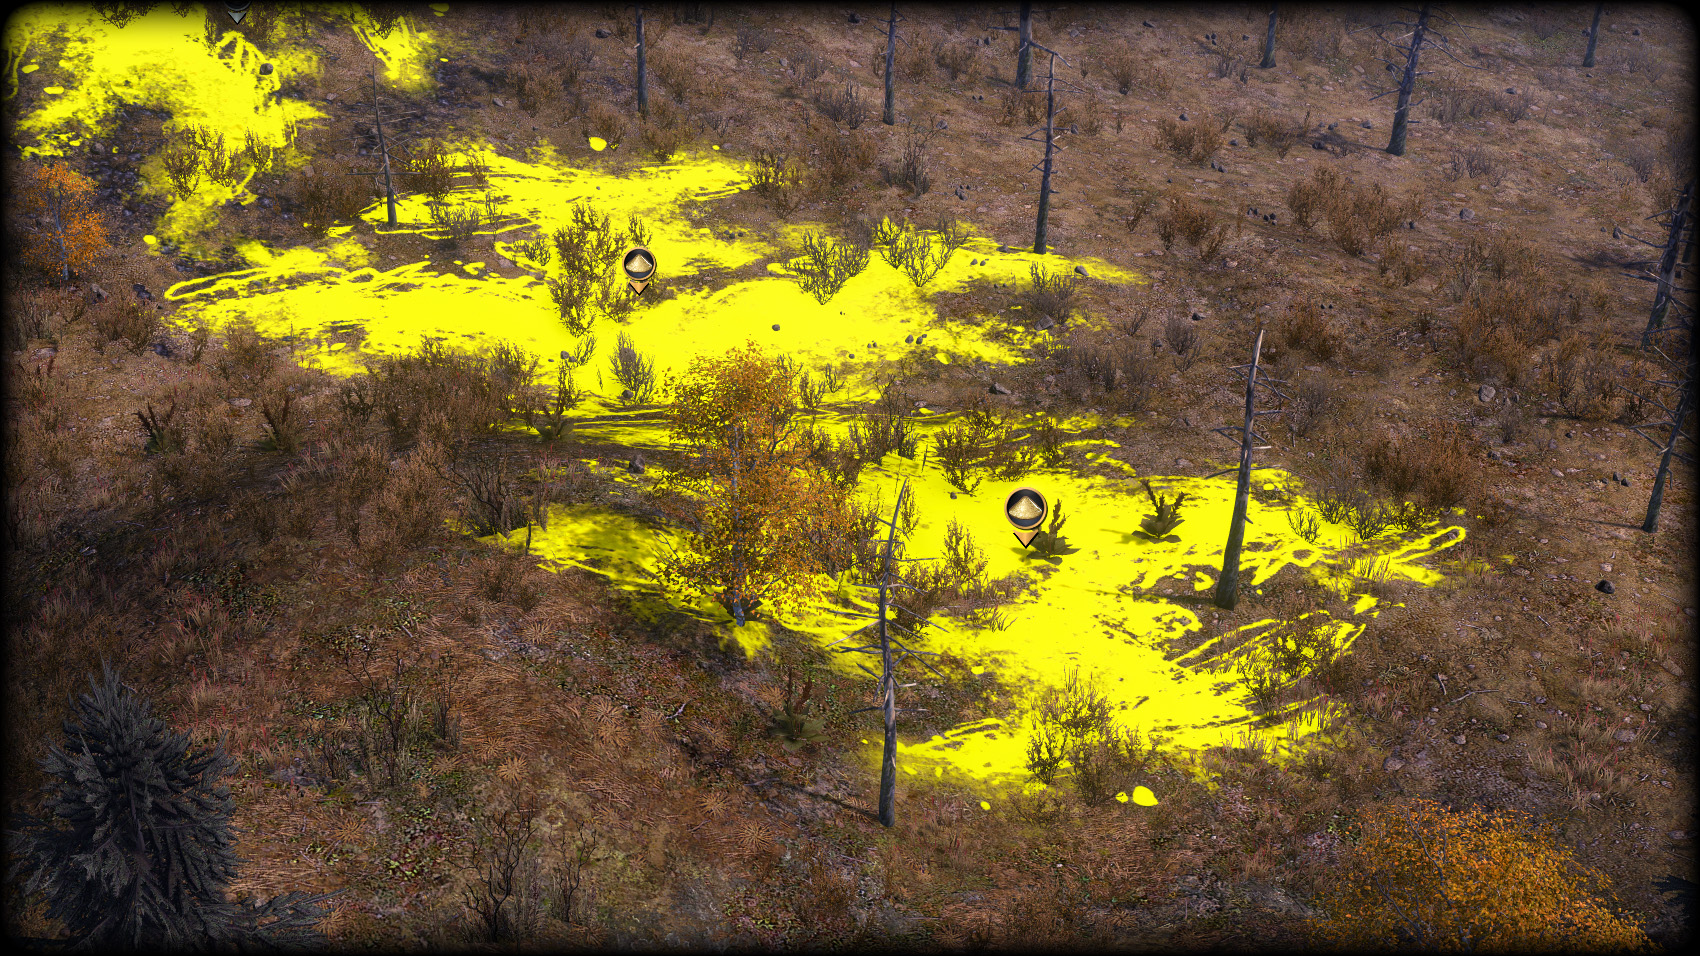
Similarly, clay and sand deposits are highlighted when placing Clay Pits and Sand Pits, respectively. These are shown in bright yellow. Just like ore, the deposits eventually run dry and the pits constructed over them closed.
It is possible to be in an area that has very low quantities of these resources or, in some cases, none at all! Trade can play a major role in such regions.
 Annual Report